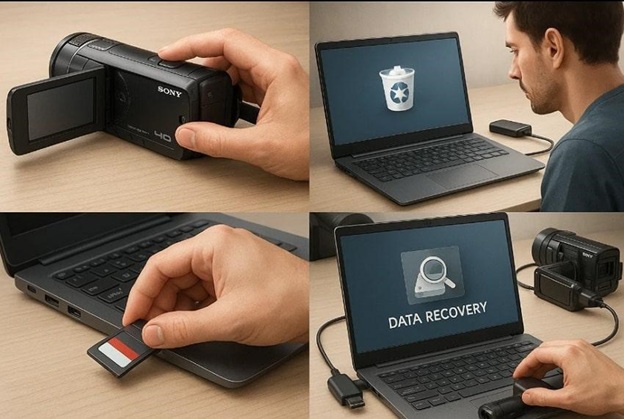
Nothing hits a creator harder than clicking a memory card and seeing missing footage right after a brilliant wrap. Whether a sudden glitch wiped your card or a quick slip of the thumb deleted your primary angle, your instant reaction dictates everything. To successfully recover deleted photos and videos, you must freeze your workflow the second disaster strikes. Your camera drive holds onto those silent file fragments—giving you a vital window of opportunity to rescue your masterpiece before fresh data buries it forever.
Quick Answer for Creators
Power down the camera or disconnect the storage device safely. Label it so nobody reuses it during another shoot. Prepare a Windows computer, a reliable card reader, and a separate healthy drive with enough free space. Start with existing copies and non-destructive checks. If recovery software becomes necessary, scan the original media in read-only mode and restore selected files to the separate destination.
Why Creator Files Disappear
A creator workflow moves media through several locations. Raw images may begin on an SD card, video clips may move to an external SSD, and edited versions may live on a Windows PC. A mistaken selection, interrupted transfer, camera format command, application crash, or failed card can make files disappear at any stage.
Deletion does not always erase the underlying data at once. Many file systems mark the occupied space as available for new information. Recording another clip or copying a folder may then overwrite the old content. This is why continuing the shoot on the same card can be more damaging than the original mistake.
First Identify What Is Actually Missing
Original camera files
Check every card used during the session and confirm the camera folder structure. Cameras may split long recordings into several clips or create separate folders for photos, proxy files, and video. Do not assume a missing thumbnail means the original file is gone.
Transferred media
Search the import folder, Downloads, Pictures, Videos, project directories, and the editing application cache. Look for duplicate file names with added numbers. Confirm whether a transfer completed before the source files were removed.
Edited projects and exports
An editing project is not the same as the original media. The project may contain links to source clips stored elsewhere. Search autosave folders, render locations, export directories, and cloud version history. Recovering an export can help with delivery, but it may not replace the raw footage needed for later edits.
Match the Storage Device to the Risk
SD cards and memory cards
Remove the card from the camera and move its lock switch to the protected position when available. Use a stable reader and inspect the card only from a Windows computer. A focused memory card recovery workflow is appropriate for logically deleted or formatted media. Stop if the card repeatedly disconnects, reports the wrong capacity, or cannot remain readable.
Windows PCs and SSDs
Avoid routine computer use if the lost files were on the system drive. Browsers, editing tools, updates, and cache processes can create new data. SSD TRIM may sharply reduce the opportunity to restore deleted content, so act quickly without accepting promises of guaranteed recovery.
External hard drives and SSDs
Check the cable, power supply, and another trusted port without initializing or formatting the device. Stable media with a logical deletion may be suitable for a hard drive recovery scan. Clicking, grinding, burning smells, severe read errors, or repeated disconnections call for a specialist.
How PandaOffice Drecov Supports Creator Recovery
PandaOffice Drecov serves as Windows data recovery software that scans PCs, USB drives, SD cards, memory cards, hard drives, SSDs, and external drives. It helps users recover deleted photos and videos, documents, emails, audio files, and archives. The software offers a read-only mode alongside Quick Scan, Deep Scan, file filtering, a pre-recovery preview, and saving to a healthy destination. However, it cannot repair physical hardware damage or restore fully overwritten data.
For visual creators, preview matters because a file name alone may not identify the correct take. Filters can help narrow a large result set by type or other available properties. A preview can show whether an image opens and whether a discovered clip is the content you expected. Full verification still happens after recovery.
Step 1: Open Drecov and select the original media
Install the program away from the partition that held the missing files. Use the Drecov on a safe Windows location, then open Drecov. Select the original SD card, memory card, PC folder, hard drive, SSD, or external drive where the shoot files last existed.
Step 2: Run Quick Scan before Deep Scan
Start with Quick Scan for recently deleted media on a stable device. If the target files do not appear, use Deep Scan. Deep results may lose original names or folder paths, so review file types and likely sizes instead of searching only for the old camera name.
Step 3: Filter and preview the creative files
Focus on the formats used by the camera or editing workflow. Preview photos and videos before selection. For footage that needs a more media-focused workflow, review the video recovery guidance. A preview is useful evidence, but it does not guarantee that every frame or audio section is intact.
Step 4: Recover to the healthy destination
Select the separate drive prepared earlier and recover the most important originals first. If the files are not in the expected destination, check the Drecov folder or Recovery folder. Keep the source device unchanged until all priority media has been verified and backed up.
Verify Photos and Videos Before Reusing the Device
Open images at full size and inspect several areas for corruption, color blocks, or incomplete rendering. Play each critical video beyond the opening seconds, seek through the timeline, and confirm audio where applicable. Compare durations and dimensions with the shoot notes. Test project files with copies of the recovered media rather than changing the only recovered set.
Create a second backup after verification. Only then should you consider repairing or formatting the original card or drive. If the device caused unexplained errors, retire it from paid or irreplaceable shoots even when it appears usable again.
Mistakes That Turn a Small Loss Into a Lost Shoot
Recording test footage on the affected card is a common mistake. Other risks include installing recovery software on the source, exporting new edits to the same drive, repeatedly scanning unstable media, and accepting a format prompt. Repair and formatting change storage structures. They are not substitutes for extracting missing media.
Creators should also avoid renaming hundreds of recovered files before checking them. Preserve the first recovered set, document the source, and work from a duplicate. This makes it easier to reconnect media in an editing project and prevents a rushed cleanup from destroying useful evidence.
Protect the Next Content Shoot
Use multiple cards, verify transfers before deleting originals, and keep at least two copies on different devices. Add an offsite or cloud copy for completed work. Label cards clearly, replace unreliable media, and separate source, working, and export folders. These habits shorten recovery decisions and protect both creative work and client trust.
When creators need to recover deleted photos and videos, the safest sequence is simple: stop writes, find existing copies, assess the device, prepare another destination, scan carefully, preview results, and verify recovered media. PandaOffice Drecov can support logical Windows recovery with a read-only workflow, while unstable or physically damaged devices require specialist handling.